Chapter 22. Seam tools - JBoss Seam 1.1.1 正式版英文参考手册
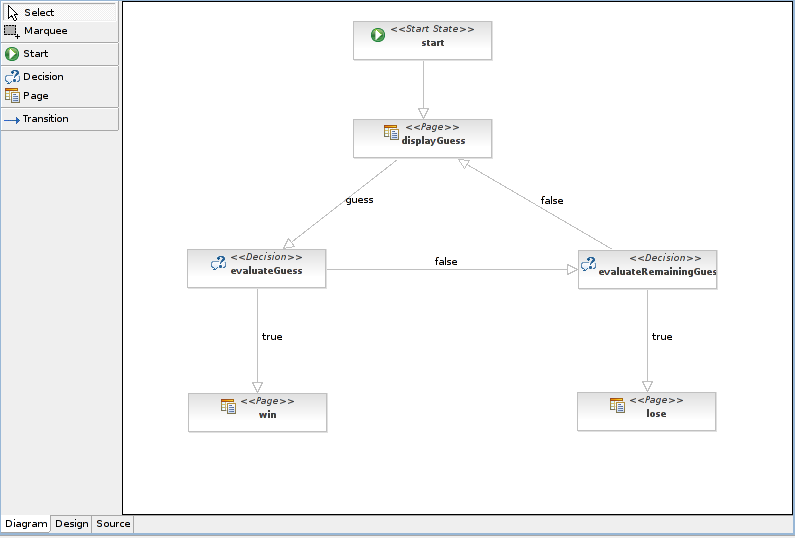
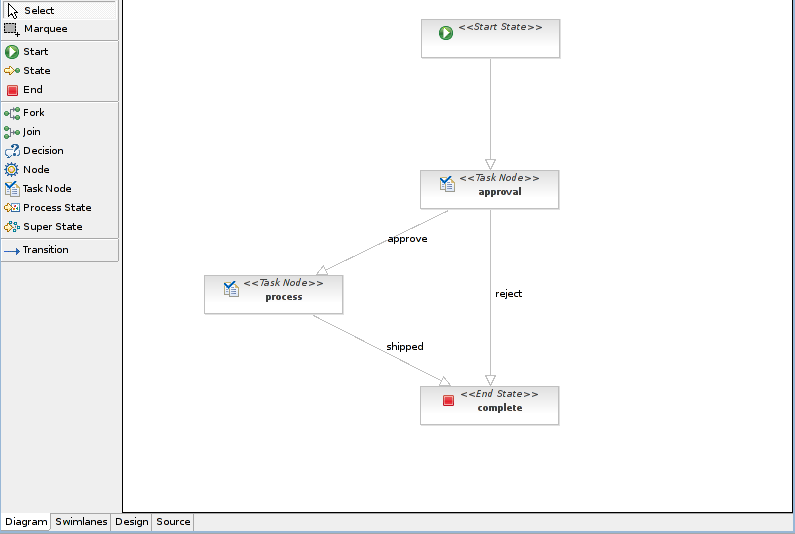
The jBPM designer and viewer will let you design and view in a nice way your business processes and your pageflows. This convenient tool is part of JBoss Eclipse IDE and more details can be found in the jBPM's documentation (http://docs.jboss.com/jbpm/v3/gpd/)
This tool lets you design your own business process in a graphical way.
This chapter, will give you a short overview of the support for Seam that is available in the Hibernate Tools. Hibernate Tools is a set of tools for working with Hibernate and related technologies, such as JBoss Seam and EJB3. The tools are available as a set of eclipse plugins and Ant tasks. You can download the Hibernate Tools from the JBoss Eclipse IDE or Hibernate Tools websites.
The specific support for Seam that is currently available is generation of a fully functional Seam based CRUD-application. The CRUD-application can be generated based on your existing Hibernate mapping files or EJB3 annotated POJO's or even fully reverse engineered from your existing database schema.
The following sections is focused on the features required to understand for usage with Seam. The content is derived from the the Hibernate Tools reference documentation. Thus if you need more detailed information please refer to the Hibernate Tools documentation.
To be able to reverse engineer and generate code a hibernate.properties or hibernate.cfg.xml file is needed. The Hibernate Tools provide a wizard for generating the hibernate.cfg.xml file if you do not already have such file.
Start the wizard by clicking "New Wizard" (Ctrl+N), select the Hibernate/Hibernate Configuration file (cfg.xml) wizard and press "Next". After selecting the wanted location for the hibernate.cfg.xml file, you will see the following page:
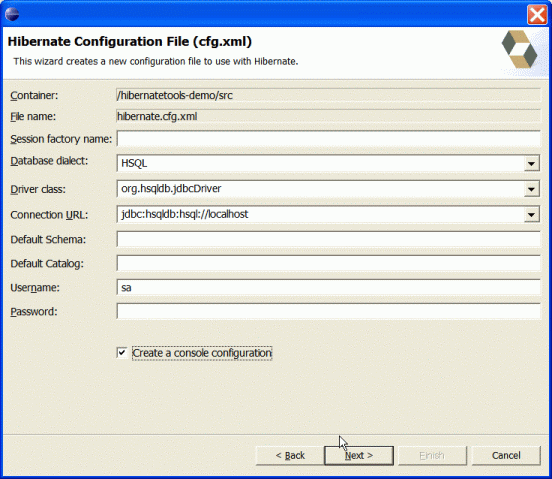
Tip: The contents in the combo boxes for the JDBC driver class and JDBC URL change automatically, depending on the Dialect and actual driver you have chosen.
Enter your configuration information in this dialog. Details about the configuration options can be found in Hibernate reference documentation.
Press "Finish" to create the configuration file, after optionally creating a Console onfiguration, the hibernate.cfg.xml will be automatically opened in an editor. The last option "Create Console Configuration" is enabled by default and when enabled i will automatically use the hibernate.cfg.xml for the basis of a "Console Configuration"
A Console Configuration describes to the Hibernate plugin which configuration files should be used to configure hibernate, including which classpath is needed to load the POJO's, JDBC drivers etc. It is required to make usage of query prototyping, reverse engineering and code generation. You can have multiple named console configurations. Normally you would just need one per project, but more (or less) is definitly possible.
You create a console configuration by running the Console Configuration wizard, shown in the following screenshot. The same wizard will also be used if you are coming from the hibernate.cfg.xml wizard and had enabled "Create Console Configuration".
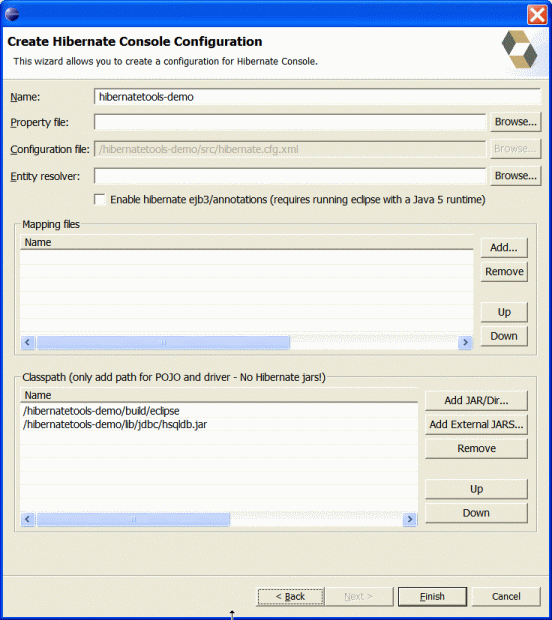
The following table describes the relevant settings. The wizard can automatically detect default values for most of these if you started the Wizard with the relevant java project selected
Table 22.1. Hibernate Console Configuration Parameters
Parameter | Description | Auto detected value |
|---|---|---|
Name | The unique name of the configuration | Name of the selected project |
Property file | Path to a hibernate.properties file | First hibernate.properties file found in the selected project |
Configuration file | Path to a hibernate.cfg.xml file | First hibernate.cfg.xml file found in the selected project |
Enable Hibernate ejb3/annotations | Selecting this option enables usage of annotated classes. hbm.xml files are of course still possible to use too. This feature requires running the Eclipse IDE with a JDK 5 runtime, otherwise you will get classloading and/or version errors. | Not enabled |
Mapping files | List of additional mapping files that should be loaded. Note: A hibernate.cfg.xml can also contain mappings. Thus if these a duplicated here, you will get "Duplicate mapping" errors when using the console configuration. | If no hibernate.cfg.xml file is found, all hbm.xml files found in the selected project |
Classpath | The classpath for loading POJO and JDBC drivers. Do not add Hibernate core libraries or dependencies, they are already included. If you get ClassNotFound errors then check this list for possible missing or redundant directories/jars. | The default build output directory and any JARs with a class implementing java.sql.Driver in the selected project |
Clicking "Finish" creates the configuration and shows it in the "Hibernate Configurations" view
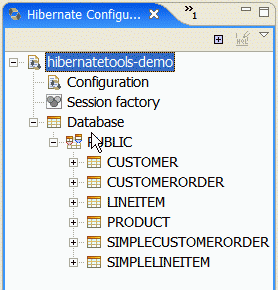
A very simple "click-and-generate" reverse engineering and code generation facility is available. It is this facility that allows you to generate the skeleton for a full Seam CRUD application.
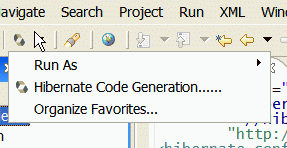
To start working with this process, start the "Hibernate Code Generation" which is available in the toolbar via the Hibernate icon or via the "Run/Hibernate Code Generation" menu item.
When you click on "Hibernate Code Generation" the standard Eclipse launcher dialog will appear. In this dialog you can create, edit and delete named Hibernate code generation "launchers".
The dialog has the standard tabs "Refresh" and "Common" that can be used to configure which directories should be automatically refreshed and various general settings launchers, such as saving them in a project for sharing the launcher within a team.

The first time you create a code generation launcher you should give it a meaningfull name, otherwise the default prefix "New_Generation" will be used.
Note: The "At least one exporter option must be selected" is just a warning stating that for this launch to work you need to select an exporter on the Exporter tab. When an exporter has been selected the warning will disappear.
On the "Main" tab you the following fields:
Table 22.2. Code generation "Main" tab fields
Field | Description |
|---|---|
Console Configuration | The name of the console configuration which should be used when code generating. |
Output directory | Path to a directory into where all output will be written by default. Be aware that existing files will be overwritten, so be sure to specify the correct directory. |
Reverse engineer from JDBC Connection | If enabled the tools will reverse engineer the database available via the connection information in the selected Hibernate Console Configuration and generate code based on the database schema. If not enabled the code generation will just be based on the mappings already specified in the Hibernate Console configuration. |
Package | The package name here is used as the default package name for any entities found when reverse engineering. |
reveng.xml | Path to a reveng.xml file. A reveng.xml file allows you to control certain aspects of the reverse engineering. e.g. how jdbc types are mapped to hibernate types and especially important which tables are included/excluded from the process. Clicking "setup" allows you to select an existing reveng.xml file or create a new one.. |
reveng. strategy | If reveng.xml does not provide enough customization you can provide your own implementation of an ReverseEngineeringStrategy. The class need to be in the claspath of the Console Configuration, otherwise you will get class not found exceptions. |
Generate basic typed composite ids | This field should always be enabled when generating the Seam CRUD application. A table that has a multi-colum primary key a <composite-id> mapping will always be created. If this option is enabled and there are matching foreign-keys each key column is still considered a 'basic' scalar (string, long, etc.) instead of a reference to an entity. If you disable this option a <key-many-to-one> instead. Note: a <many-to-one> property is still created, but is simply marked as non-updatable and non-insertable. |
Use custom templates | If enabled, the Template directory will be searched first when looking up the velocity templates, allowing you to redefine how the individual templates process the hibernate mapping model. |
Template directory | A path to a directory with custom velocity templates. |
The exporters tab is used to specify which type of code that should be generated. Each selection represents an "Exporter" that are responsible for generating the code, hence the name.
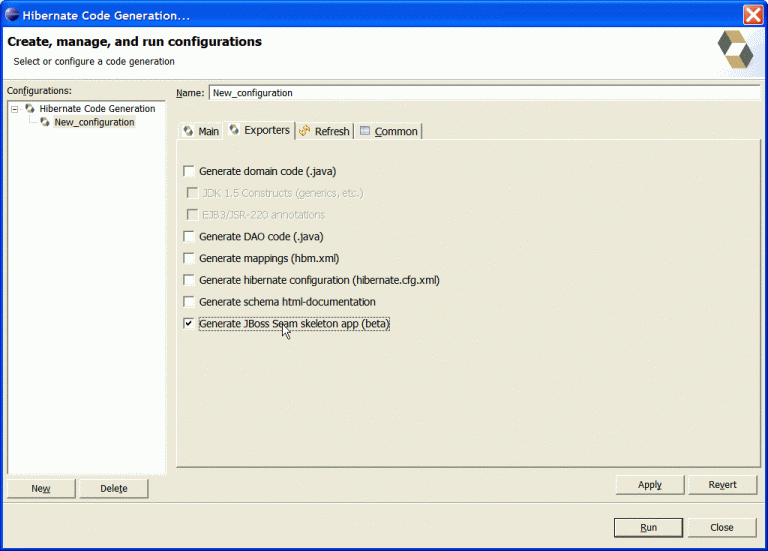
The following table describes in short the various exporters. The most relevant for Seam is of course the "JBoss Seam Skeleton app".
Table 22.3. Code generation "Exporter" tab fields
Field | Description |
|---|---|
Generate domain code | Generates POJO's for all the persistent classes and components found in the given Hibernate configuration. |
JDK 1.5 constructs | When enabled the POJO's will use JDK 1.5 constructs. |
EJB3/JSR-220 annotations | When enabled the POJO's will be annotated according to the EJB3/JSR-220 persistency specification. |
Generate DAO code | Generates a set of DAO's for each entity found. |
Generate Mappings | Generate mapping (hbm.xml) files for each entity |
Generate hibernate configuration file | Generate a hibernate.cfg.xml file. Used to keep the hibernate.cfg.xml uptodate with any new found mapping files. |
Generate schema html-documentation | Generates set of html pages that documents the database schema and some of the mappings. |
Generate JBoss Seam skeleton app (beta) | Generates a complete JBoss Seam skeleton app. The generation will include annotated POJO's, Seam controller beans and a JSP for the presentation layer. See the generated readme.txt for how to use it. Note: this exporter generates a full application, including a build.xml thus you will get the best results if you use an output directory which is the root of your project. |
When you have finished filling out the settings, simply press "Run" to start the generation of code. This might take a little while if you are reverse engineering from a database.
When the generation have finished you should now have a complete skeleton Seam application in the output directory. In the output directory there is a readme.txt file describing the steps needed to deploy and run the example.
If you want to regenerate/update the skeleton code then simply run the code generation again by selecting the "Hibernate Code Generation" in the toolbar or "Run" menu. Enjoy.

